Integrating a persisted WF4.0 Workflow with MVC
Introduction
Writing this as lately I've been interested in WF4.0 (it's always pronounced "dub-F" in my head) and saw a post about using WF with MVC to handle a site registration wizard. The tutorial it linked to used a state machine (WF only supports Sequential OOB) workflow without persistence, which made me think that you could easily use a normal workflow with persistence to do a lot of other things inside a web application. WF which is part of .NET4.0 allows you to easily create and call workflow processes, small or large, from anywhere inside .NET code and it's been drastically improved since .NET3.5. That ease makes it practical to use workflow in places which it was previously too complicated to integrate, places where we normally manually code a process into business or web logic making it difficult to maintain and add standard features like tracing/auditing.
To run the sample or try this yourself you will need .NET4.0 and Visual Studio 2010, the instructions below are a simple overview and do not include all code or references.
1. Creating the WF SQL Persistence store
WF4.0 supports using a default SQL Persistence store, using a DB created using scripts in the .NET4.0 framework directory. Simply create a new DB (call it whatever you like) on your server and run the following scripts:
- C:WindowsMicrosoft.NETFrameworkv4.0.21006SQLenSqlWorkflowInstanceStoreSchema.sql
- C:WindowsMicrosoft.NETFrameworkv4.0.21006SQLenSqlWorkflowInstanceStoreLogic.sql
Multiple workflows can share the same DB or you can separate them out if you want.
2. Creating the MVC site and Workflow Activity Library
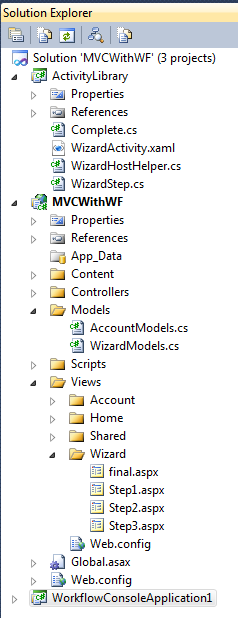
In Visual Studio, create a new MVC Web Application and add another project of type "Activity Library" (under templates Workflow) to hold your workflow. I also added a console application to test the workflow independently but this is not necessary.
3. Creating the Workflow


Delete the existing workflow activity and create a new one with the name WizardActivity, in the activity drag and drop a Flowchart from the toolbox onto the workflow (using this instead of a state machine) and add a variable "Outcome" to the Flow chart scope (used to store the outcome Next/Back of the steps). In the Activtiy project add a new Class, WizardStep, which will be generic custom activity used for all the steps in the workflow. This activity contains the bookmark code which is used to halt and persist the workflow at the steps. Add the code and compile the project, this will update the workflow toolbox adding WizardStep and allowing you to drag and drop it onto the workflow. Add three Wizard steps to the workflow, setting the Name to "StepN", Bookmark Name to "StepN" and Input to "Outcome" (this is an output parameter which will set Outcome to the value supplied when resuming the Bookmark in the custom activity). Add a custom Complete activity (which does nothing) and link up the workflow using Decision controls (set condition to "Outcome.Equals("Next")") and arrows as per image. Lastly add a new Class WizardHostHelper (copy code from sample), which acts as the host for the workflow; creating the Workflow application object, setting instance store values, starting/resuming the workflow, actioning the bookmarks.
4. Update the MVC application to use the Workflow
Now to integrate the workflow into the website.
- Add a new class WizardModels, to hold the model logic for the wizard steps and workflow service (wrapper to WizardHostHelper).
- Add a new controller WizardController, for controller logic used in the wizard.
- Add four new views under Wizard, Step1-3 and final, for the views used in the Wizard.
- Update AccountModel, add a Guid parameter workflowKey to the MembershipService.CreateUser method, this will store the Workflow Instance key in the standard ASP user security providerUserKey. Also add a method GetUserWorkflowKey to return the key for a username.
- Update AccountController, changing Register method to start a workflow instance for the user using the WizardModels.WorkflowService and supply the workflow key into CreateUser. Update both Register and Logon to redirect action to the Wizard index.
- Update the web.config to set the instance store connection string.

And that should be it, registering a new user will now start the workflow process and redirect to the first step. Next/Back buttons on the step views cause the controller to action the steps, progressing the workflow. The workflow is persisted to the DB at each step, so even if the website goes down the current step of the user in the workflow is maintained. The workflow, rather than the controller, decides which step the website should display, separating the process logic from the controller logic.
There is very little code involved, just small service/host classes used to access the workflow and integrate with the website. To add persistence it only really took two lines of code in the host class (setting the workflow application instance store and telling it to persist when idle at the bookmarks), compared to the tutorial sample host. The workflow used could be much more complicated, branching to different steps depending on user response (e.g. redirecting to a different address screen if the user isn't based in the UK) without adding complexity to the controller logic. As the workflow is separated from the website it can be tested independently (no website needed! automated testing!) and updated without large changes needed in the website. It's also a very light weight (and cheap) way to add workflow, which is something we may need going forward. I'm currently looking at ways now to use WF with persistence in Azure cloud (without the upcoming Azure AppFabric) for simple workflow solutions, as right now we can't use our current workflow applications like K2.
Attached sample inside word doc as Posterous won't accept zips.